Over time, a home begins to shift and settle.
As this happens, the weak points of the walls wind up cracking under the increased levels of pressure.
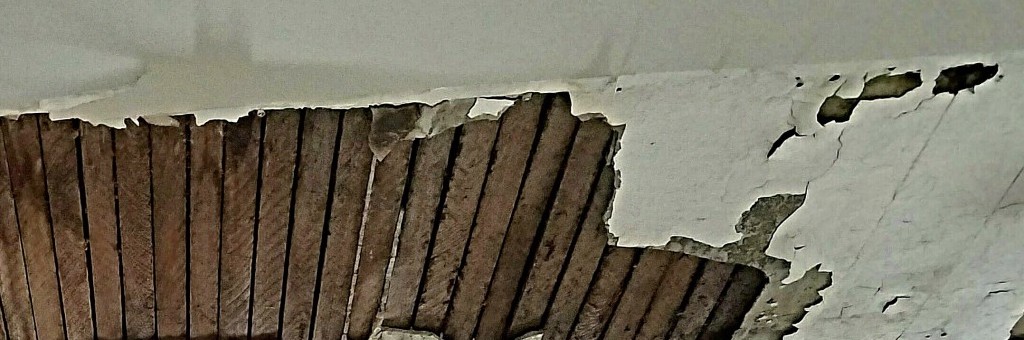
One of the more difficult repairs to make is when the crack occurs somewhere in the ceiling.
By knowing how to repair a plaster ceiling, however, you’ll be able to maintain the aesthetic value of a home with only a little bit of work.
Here’s what you’ve got to do.
1. Determine The Cause Of The Crack.
Many plaster cracks in the ceiling are because of the natural aging and settling process, but there may be another issue present.
Water in the ceiling may cause cracking, as can added weight being placed directly on the ceiling from above.
If the wall is beginning to pull away from the structural supports, then there is a good chance that water could be the issue.
2. Remove Any Damaged Components.
If there is drywall that has been damaged, then it will need to be removed to complete the repair.
Look for mold, mildew, or a crunchy feeling to the texture or plaster when you touch it.
If it is loose, sometimes a simple drywall screw can fix the issue.
If there is just a crack present, then you can move to the next step.
3. Remove Any Loose Dust And Debris.
You may need a vacuum to remove extra dust or debris.
A damp cloth will work as well.
If you use a damp cloth, the area will need to dry before you can proceed to the next repair step.
This step is especially important if there is debris within the gap of sagging drywall.
4. Support The Crack.
Once you have the ceiling supported, you’ll need to begin supporting the crack so the issue doesn’t occur again.
You’ll need to create injection holes in order to do this.
A 0.25 inch bit usually works the best for this as it has the least amount of risk for causing additional damage while still giving you room to use adhesive.
Once the holes are drilled, you’ll once again need to remove debris before filling them.
5. Inject The Adhesive.
Using a latex product that is water-based is usually the best solution to fix a crack in a plaster ceiling, but there are plenty of other acrylic adhesives that can work as well.
You’ll need a caulking gun that can be inserted into the injection holes that you’ve just drilled.
Be careful not to inject too much adhesive into each hole because this can cause the plaster to come off of the ceiling.
Use a damp sponge to create a flush surface.
Repeat until done.
6. Allow To Dry.
It may take between 24-72 hours for the adhesive to fully dry.
You cannot begin the next step until the bond is solid.
Sand down any rough areas before beginning the final repair step as well and be sure to remove any dust or debris that is created.
7. Apply The Paste Filler To The Crack.
Now that the ceiling is fully secured to its foundation, you’re ready to use the filler paste that will help to repair the crack.
Look for a sandable paste that dries hard and quickly so you don’t experience a lot of shrinkage during the final step.
You’ll need to make the crack flush with the ceiling and this may take up to 3 different applications to make sure the repair holds properly.
Allow to dry according to your product instructions.
8. Use a Skim Coat Of Plaster Or Joint Compound.
After the crack has been filled and is flush, it’s time to cover up the repair site.
You can use a thin layer of plaster, joint compound, or a layer of paint for this step.
If you have texture that needs to be replicated, however, it may be better to avoid paint so you won’t have to paid twice.
9. Finish The Repair.
Once your covering component has dried, you’re ready to finalize the repair.
Paint the site to match the rest of the ceiling.
Then you’ll have a plaster ceiling repair that helps your room look as good as new.
Knowing how to repair a plaster ceiling means going through an extensive and labor intensive process.
When done correctly, however, the plaster ceiling can look as good as new for years to come.
Follow these steps to begin your own repair and you’ll find that what seems like a difficult job may be a little easier than expected.